

© heavenlyartworks.com 1982


We started making ceramic decals almost by chance. We were asked if we could
do a very large order for the military and decided to give it a try. I had done paper
jigs before and thought this would be easy. First we had to find a dealer who sold
the ink pigments, then we had to find out how to mix the pigments, what paper to
use to print them, and how to coat and dry and then fire them onto ceramics. At
the same time we found a kiln for sale. It took us about 6 months to learn how to
do this because there are no books or instruction manuals on how to print ceramic
decals so we had to learn by experimenting and making mistakes. After that, this
part of the business just took off. We ended up selling to people all over the
country for businesses, schools, colleges, and individuals.
Dry decal pigments are mixed with a thick grinding vehicle to
make a thick ink. The ink is silkscreened onto a special release
paper, dried, coated with a liquid plastic-like material and dried
again. The coating cannot be too thick or the ink will melt and
distort the design. Once the coating has dried, the decal is soaked
in water, and the image slides off the paper and onto a ceramic
object. If any air bubbles are left under the decal, the ink in that
spot won't fire onto the ceramic, but will burn away during firing,
leaving a gap in the design. Mixing colors, the fired image is not
always the same as the color on the decal before firing.
We would do as few as one decal for people. Our clients were mainly small
ceramics shops. A large company who sold ceramic molds found out about
us from an ad we put in a ceramic convention magazine, and they advertised
our business for free in their newsletter. Two other large decal companies
who only print orders of hundreds of decals in 16 colors found out that we
would print small orders, so they passed our name on to people who were
too small for them to sell to.


This was our very first decal printed in 1987.
We airbrushed the color onto the
printed decal.
We did small runs for large companies.


Coffee cups were personalized with the logo on the
front and name on the back. You can see above the
cups and how the decal will change to a darker
color. You had to know how to mix the pigments to
get the decals to fire just right.
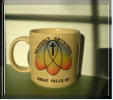
We made cups for a lot of schools. New
teachers would ask how do you get a cup. So
every year we had a new batch of cups to
make. We also did bed and breakfast places.
The military got a lot of cups also.
This is just a test print of most of the decals on
this page. We had to test print each decals and
sometimes fire them. Should have taken more
pictures of our good work but when you get
busy and have to ship things out you just don't
think about it.

GLASS DECALS
The decal to the left is a glass decal. Glass is
fired on at a very low temperature. You have to
check them often or the kiln will melt the glass.
We should know, we have done it

The decal on the left is what a customer sent us. As you
can see the word Reunion is spelled wrong.We had
printed 200 of them and we always check each decal to
make sure the paint did not run and the cover coat was
on right. So we caught it before it went out and I fixed
it in the computer then reprinted them the next day.
Good thing it was not a rush order or saw it after we
sent the order. Boy, isnt being in business is so much
fun, right? When you print decals most are printed in a
sheet of 2 to 4 at a time.

I made the drawing on the left and we made the
decal on the right. All of the color is hand painted
in after the black and white print. It is then fired
onto a tile. This way no two tiles are the same.


The cup above is called a wrap. The decal is
long to wrap around the entire cup. This one
was made for the speedway by the Washington
and Idaho border.
Below is our first shop before we made the
cabinets and decal drying racks.


Airbrushed and hand painted decals


I tested lots of ways to add decals to cups with a design.
So at left we airbrushed the cup first then applyed the
decals over the top. It fired just fine.
At right is our kids cup. The kids make a drawing in class
or scouts with a black marker. Then we make each decal
and each cup is one of a kind. This is back when
sublimation was new and the design would come off in
the dishwasher. Ours is fired on at over 2500 degrees so
they are dishwasher safe.


We made this logo for us. Used it with shirts,
cups, and decals samples.


As you can see by the year on the cup above we
made this decal for many years. Artwork by a
student.
We printed each employee’s name in the white space
with a dark gray and white letters.

We could use the logo Made in Montana after
registering with the state. 80% of the product had
to be made in Montana to use the logo.
Small tiles. We made them as magnets for
the fridge.


GLASS DECALS


Tri-fold flyers

Kids cup


Kids mug were so much fun to see all the designs


© heavenlyartworks.com 1982


Dry decal pigments are mixed with
a thick grinding vehicle to make a
thick ink. The ink is silkscreened
onto a special release paper, dried,
coated with a liquid plastic-like
material and dried again. The
coating cannot be too thick or the
ink will melt and distort the design.
Once the coating has dried, the
decal is soaked in water, and the
image slides off the paper and onto
a ceramic object. If any air bubbles
are left under the decal, the ink in
that spot won't fire onto the
ceramic, but will burn away during
firing, leaving a gap in the design.
Mixing colors, the fired image is
not always the same as the color on
the decal before firing.
We would do as few as one decal for people. Our clients were mainly small
ceramics shops. A large company who sold ceramic molds found out about
us from an ad we put in a ceramic convention magazine, and they
advertised our business for free in their newsletter. Two other large decal
companies who only print orders of hundreds of decals in 16 colors found
out that we would print small orders, so they passed our name on to people
who were too small for them to sell to.


This was our very first decal printed in 1987.
We airbrushed the color onto the printed
decal.
We did small runs for large companies.
Coffee cups were personalized with the
logo on the front and name on the
back. You can see above the cups and
how the decal will change to a darker
color. You had to know how to mix the
pigments to get the decals to fire just
right.
We made cups for a lot of schools.
New teachers would ask how do
you get a cup. So every year we
had a new batch of cups to make.
We also did bed and breakfast
places. The military got a lot of
cups also.
This is just a test print of most of
the decals on this page. We had to
test print each decals and
sometimes fire them. Should have
taken more pictures of our good
work but when you get busy and
have to ship things out you just
don't think about it.
GLASS DECALS
The decal to the left is a
glass decal. Glass is fired
on at a very low
temperature. You have to
check them often or the kiln
will melt the glass. We
should know, we have done
it


The decal on the left is what a customer sent
us. As you can see the word Reunion is
spelled wrong.We had printed 200 of them
and we always check each decal to make sure
the paint did not run and the cover coat was
on right. So we caught it before it went out
and I fixed it in the computer then reprinted
them the next day. Good thing it was not a
rush order or saw it after we sent the order.
Boy, isnt being in business is so much fun,
right? When you print decals most are printed
in a sheet of 2 to 4 at a time.


I made the drawing on the left and we made the decal on the right.
All of the color is hand painted in after the black and white print. It
is then fired onto a tile. This way no two tiles are the same.


The cup above is
called a wrap. The
decal is long to wrap
around the entire cup.
This one was made
for the speedway by
the Washington and
Idaho border.
Below is our first shop before we made the cabinets and decal drying racks.


Airbrushed and hand painted decals

I tested lots of ways to add decals to cups with a design. So at left
we airbrushed the cup first then applyed the decals over the top.
It fired just fine.
At right is our kids cup. The kids make a drawing in class or scouts with a black
marker. Then we make each decal and each cup is one of a kind. This is back
when sublimation was new and the design would come off in the dishwasher.
Ours is fired on at over 2500 degrees so they are dishwasher safe.


We made this logo for us. Used it with
shirts, cups, and decals samples.


As you can see by the year on the cup above we made this decal for
many years. Artwork by a student.
We printed each employee’s name in the white
space with a dark gray and white letters.
We could use the logo Made in
Montana after registering with the
state. 80% of the product had to be
made in Montana to use the logo.
Small tiles. We made them as
magnets for the fridge.


GLASS DECALS


We started making ceramic decals almost by chance. We were asked if we
could do a very large order for the military and decided to give it a try. I had
done paper jigs before and thought this would be easy. First we had to find a
dealer who sold the ink pigments, then we had to find out how to mix the
pigments, what paper to use to print them, and how to coat and dry and then
fire them onto ceramics. At the same time we found a kiln for sale. It took us
about 6 months to learn how to do this because there are no books or
instruction manuals on how to print ceramic decals so we had to learn by
experimenting and making mistakes. After that, this part of the business just
took off. We ended up selling to people all over the country for businesses,
schools, colleges, and individuals.


